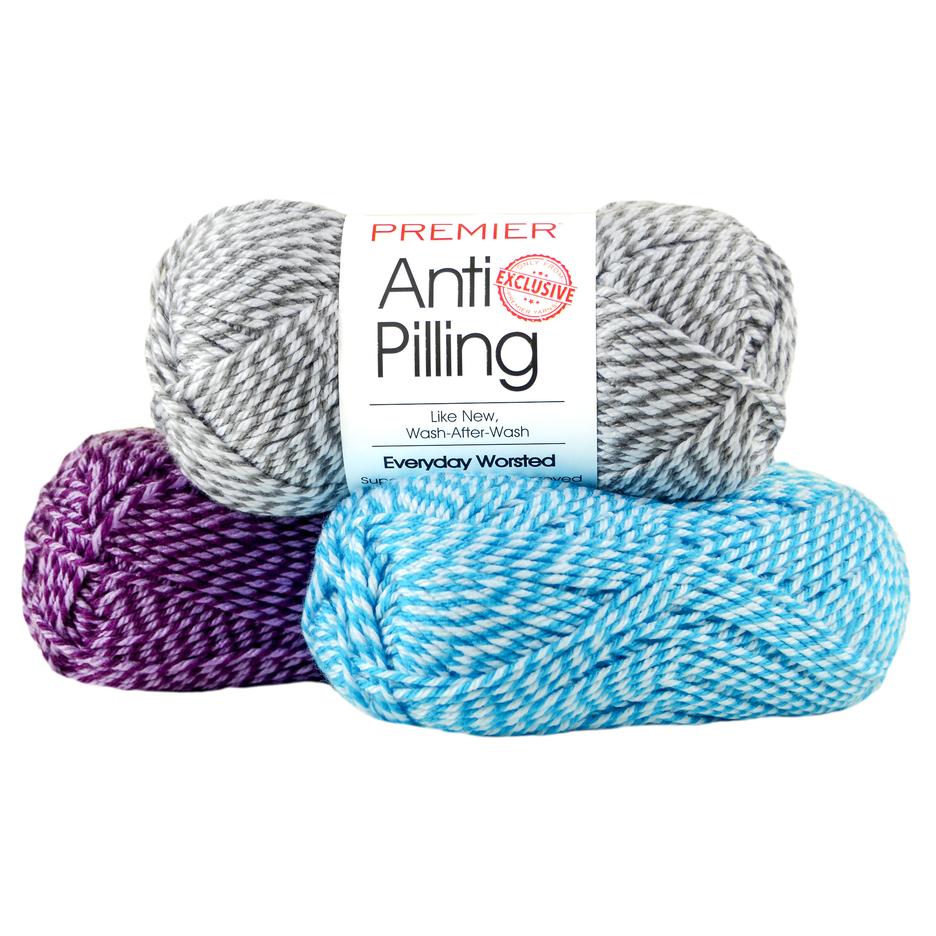
I have been dying to try our new exciting range of Marl yarn by Premier Everyday Soft, so I thought I would make some winter garments to show off this new yarn.
What is Marl Yarn? Marled yarns are made by twisting together two or more different colours. The result is a single strand of yarn with several colours twisted around one another.
What are the advantages & disadvantages I found using Premier Marl yarn? There were no disadvantages for me, only advantages. I found it to be soft and lush, gliding through my fingers. Like all Premier yarns, it is a smooth soft yarn to work with and slides through the hook with no trouble at all.
What would I recommend creating, using Marl Yarn? I can recommend using Premier Marl yarn for any garments including beanies, scrolls, scarves, can also be great for blankets and kids clothing. The range has 7 beautiful colours, it is very versatile and only really comes down to your personal choice and what you want to create using it.
Is it at an affordable cost and most importantly worth its price? Yes, it is definitely worth the cost! Considering you are getting 100 grams in each ball, I would say it is absolutely worth the cost. I only used 1 ball to create 2 beanies and even had some left over. (see pattern below)
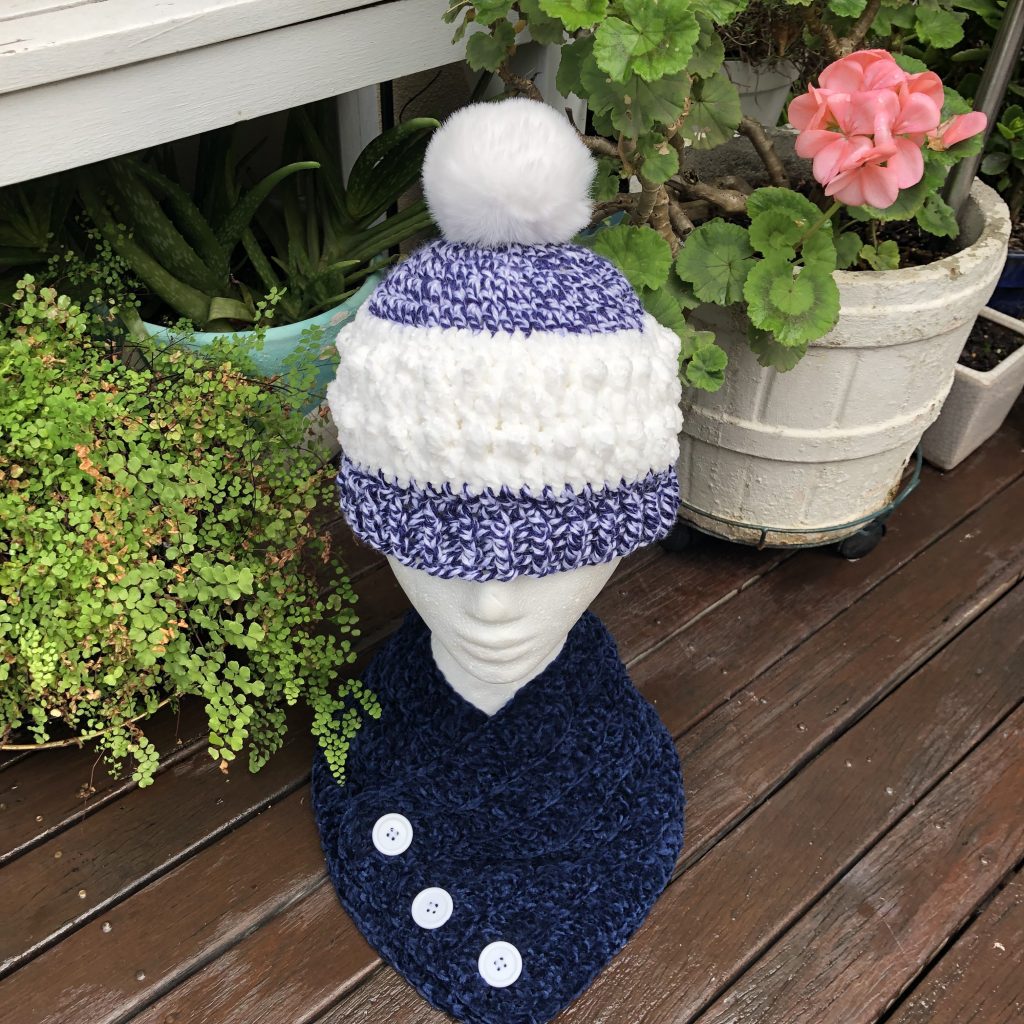
Crocheted Beanie and Neck Scroll FREE pattern.
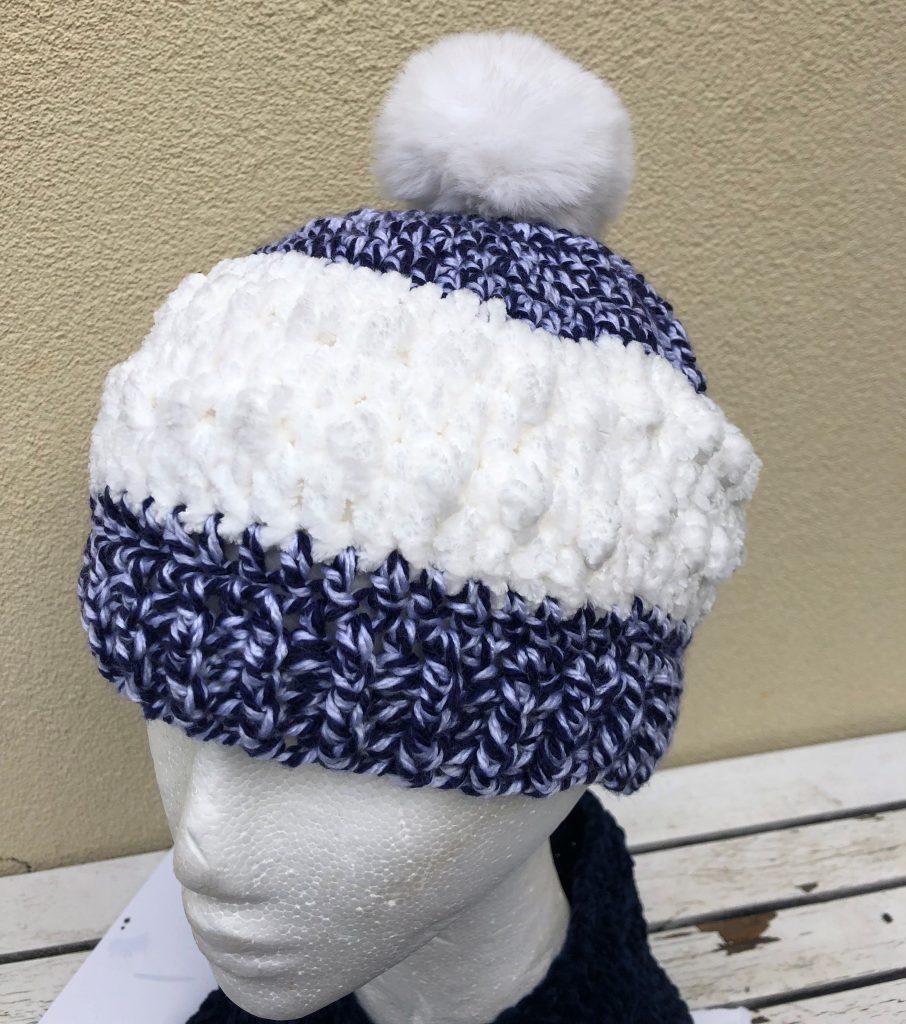
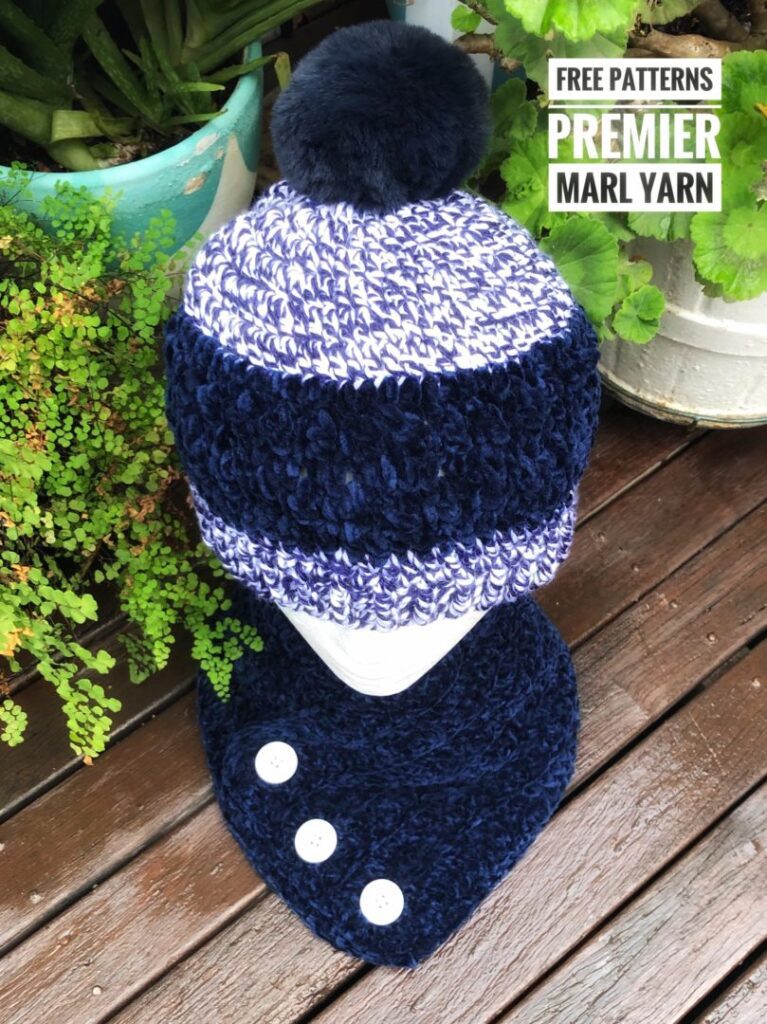
I created two beanies using Premier Marl navy yarn along with some leftover navy and white velvet. At first, I thought it was a bit too much using all of the one colour, so I blended the Marl Yarn with some left-over Velvet yarn. I think this gave the Marl yarn a nicer look and broke up the strong marl colour. If you would like to make some winter warmers, you will find the FREE patterns below which are my own designs, so I hope you like them?Beanie with Pom Pom Pattern.
Measures: Ladies size beanie
Tools Needed:
1 x ball of Premier Marl Navy and White Bernat Velvet yarn
Size 4mm crochet hook
Darning needle
Fluffy Pom Pom glued on top
Abbreviations:
MC – Magic Circle
SC – Single Crochet
DC – Double Crochet
TC – Treble Crochet
FPDC – Front Post Double Crochet
BPDC – Back Post Double Crochet
SL – Slip St
CH – Chain
ST – Stich
Tips:
To make an even join, SL ST into top of first ST in each round.
Pattern:
Row 1
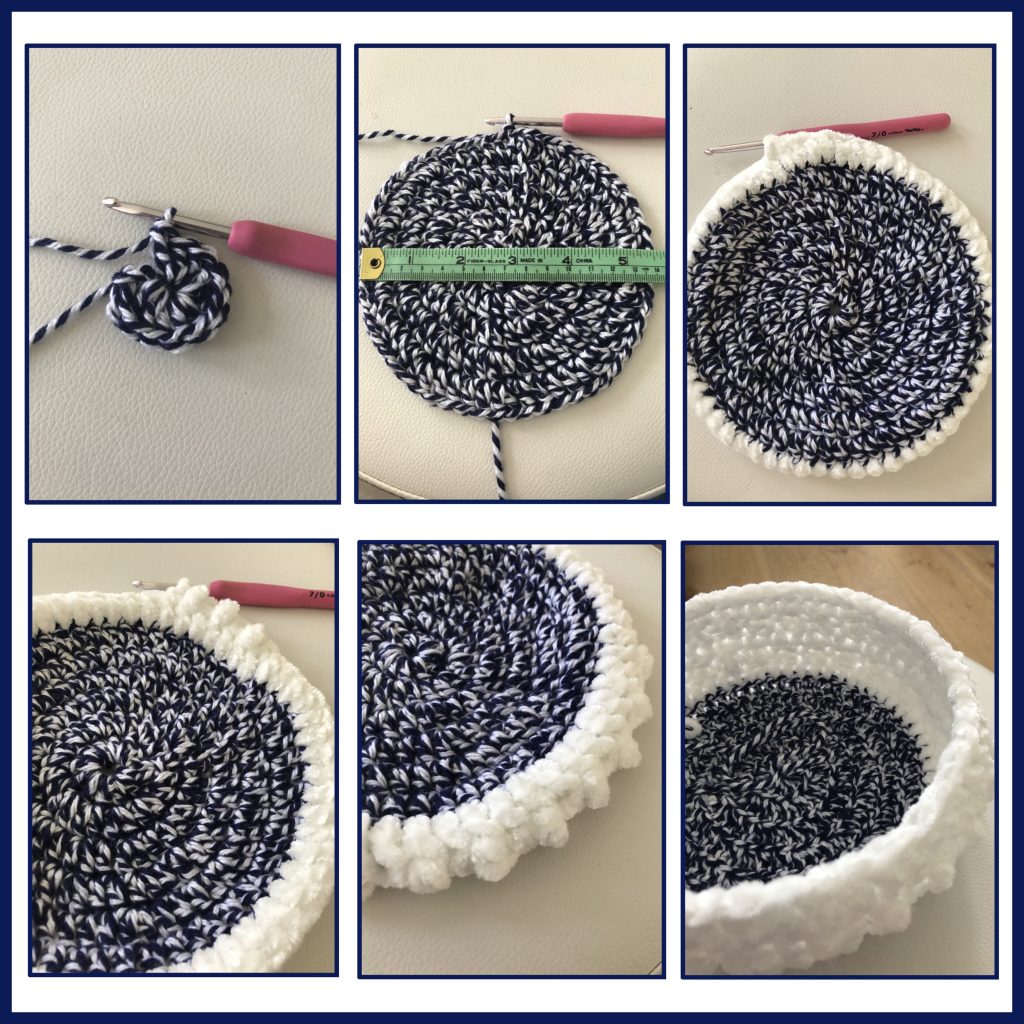
Create MC, DC x 12 into centre = 12 ST’s
To make an even join, SL ST into top of first ST in each round.
Row 2
DC x 2 into each ST creating 24 ST’s
Row 3
DC x 2 into first ST, DC x 1 into next ST, DC x 2 into next ST, continue around until you have 36 ST’s
Row 4
DC x 2 into first ST, DC x 1 into next ST, DC x 1 into next ST, DC x 2 into next ST, continue around = 48
Row 5
DC x 2 into first ST, then DC 1 into next 3 ST’s continue around = 60 ST’s
Row 6 & 7
DC x 1 into each ST around twice.
Change colour of yarn, I choose the Bernat Velvet in White.
Row 8
DC x 1 around = 60 ST’s
This row we are going to create a small bobble effect to give the beanie some texture.
Row 9
In first ST, TC, next ST, SC, continue the pattern around the 60 ST’s
Row 10
DC x 1 into each ST
Row 11
repeat row 9
Row 12
DC x 1 into each ST around
Change yarn
Row 13 to 14
DC x 1 into each ST around twice
Row 15 to 18
FPDC x 1 into first ST BPDC x 1 into next ST, this will give you the rib effect to make your beanie sit nice and tight on your head.
Finish off and sew all ends with a darning needle. I wanted to add a Pom Pom, so I found some matching colours and glued on top of the beanie.
Neck Warmer Scroll Pattern
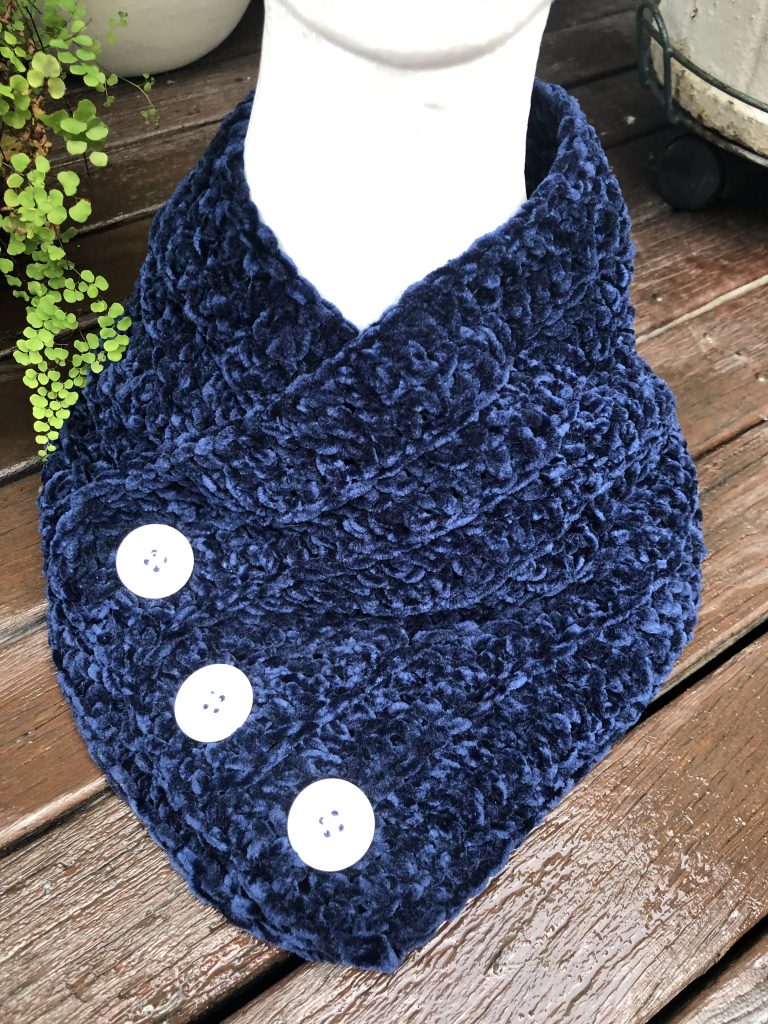
I created this lovely neck scroll to match the beanies, I had some left-over navy velvet, but you could make this neck warmer with any yarn you had left over.
Tools needed:
1 x ball of Velvet yarn
Crochet Hook: Size 5mm
Darning needle
Abbreviations:
DC – Double Crochet
TR – Treble Crochet
SL – Slip St
CH – Chain
ST – Stich
Measures: Ladies size neck warmer.
Tips:
To create a little edge effect DC into back of ST in every 3rd row.
Chain 79 Stitches
Pattern:
Row 1
Turn and DC x 1 into 2nd ST, continue and DC x 1 into each ST = 78 ST’s
Row 2
Turn CH 2 DC x 1 into next ST, continue along until end = 78 ST’s
Row 3
Turn CH 2
To create a little edge effect, DC x 1 into back of ST continue along DC x 1 into back of each ST.
Row 4
Turn CH 2 DC x 1 into each ST.
Repeat this pattern until you 12 rows of DC and every third row DC x 1 into back of ST.
Sew on buttons on the end of the Scroll, no need to add holes to the scroll for the buttons, they slide in between the stitches.
Happy Crocheting.

